Clearing Mac Browser Cache Made Easy
As we navigate through the internet on our Macs, our browsers quietly store pieces of information in what is known as a cache. This temporary data can include images, scripts, and other parts of websites that help load pages you visit frequently faster. However, over time, this cache can become cluttered and may even cause browsing issues, which is why knowing how to clear it is vital. This essay is tailored to guide the general public through the simple yet important process of clearing browser cache on a Mac. Starting with how to access your browser’s settings to locating the specific cache clearing options, and finally executing the deletion, this walkthrough will ensure you can maintain your browser’s performance and privacy efficiently.
Accessing Browser Settings
Navigating to Browser Settings on a Mac: A Step-by-Step Guide for Tech Savvy Users
In the dynamic world of technology, the ability to tweak and customize your tools is essential. When it comes to your Mac, navigating to your browser settings can unlock a plethora of customization options that enhance your browsing experience. Whether you’re a Chrome aficionado, a Safari loyalist, or a Firefox supporter, this straightforward guide will help you swiftly dive into your browser’s control center.
For Safari Users:
Safari is the native web browser for macOS, and it’s tailor-made for seamless integration with your Mac. Getting into the Safari settings is a breeze:
- Launch Safari: Click on the Safari icon in your Dock or Applications folder.
- Access Preferences: Click on the ‘Safari’ menu in the upper left-hand corner of your screen, followed by ‘Preferences’ from the dropdown menu. Alternatively, press
Command+,(comma) for a quick shortcut to the Preferences dialog box. - Explore Settings: Within the Preferences window, navigate through the various tabs like ‘General,’ ‘Tabs,’ ‘AutoFill,’ and ‘Privacy’ to customize your Safari experience.
For Chrome Users:
Google Chrome is favored by many for its speed and extensive library of extensions. To access its settings on a Mac:
- Open Chrome: Locate and open Google Chrome from your Dock or Applications folder.
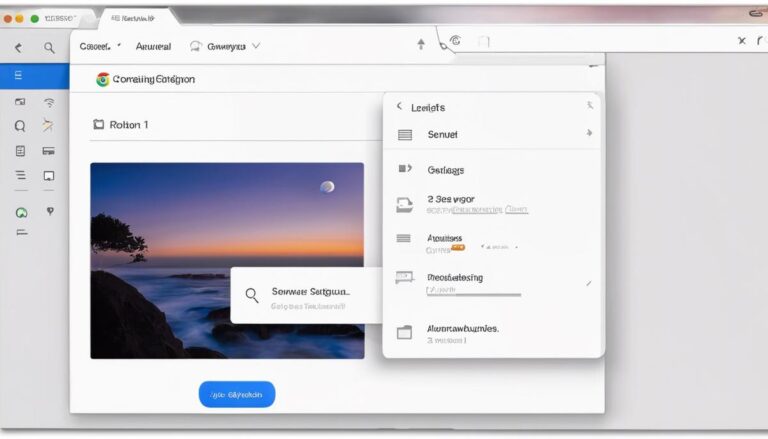
- Find Settings: Click on the vertical three-dot menu button at the upper right of the Chrome window to reveal a dropdown menu, and select ‘Settings.’
- Personalize Your Browser: The Settings tab will open within Chrome, presenting options to tweak your appearance, search engine, privacy, security, and more.
For Firefox Users:
Firefox, the privacy-centric browser, offers extensive customization for users who are security-conscious. Accessing the settings in Firefox is straightforward:
- Start Firefox: Open the Firefox browser from your Dock or Applications folder.
- Enter Settings Menu: Click on the three horizontal lines (hamburger menu) in the upper right of the Firefox window, followed by a click on ‘Preferences.’
- Adjust to Your Liking: A new tab will open with the Preferences menu, where you can modify your home page, search engine, privacy settings, and much more.
Regardless of the browser you prefer, remember that personalizing your settings is the key to a more streamlined and efficient browsing experience. Customizing your browser not only enhances performance but also increases your productivity by allowing you to navigate the web on your terms. With these succinct steps, adjusting your Mac browser settings is quick, easy, and keeps you at the forefront of the latest tech trends.

Locating the Clear Cache Option
Efficient web navigation isn’t just about personalization; it’s also about maintaining speed and performance. An often overlooked yet critical component is managing your browser’s cache. A congested cache can slow down your browsing and even cause glitches on web pages. Here’s how to keep your browser running smoothly by clearing the cache on a Mac.
For Safari Users:- Open Safari.
- From the top menu bar, select ‘Safari’ and click on ‘Preferences’.
- In the ‘Preferences’ window, go to the ‘Advanced’ tab.
- At the bottom of the pane, check the ‘Show Develop menu in menu bar’ option if it isn’t already enabled.
- Close the ‘Preferences’ window. You should now see a ‘Develop’ option in the menu bar.
- Click ‘Develop’, and from the drop-down menu, select ‘Empty Caches’.
You’ve now cleared Safari’s browser cache.
For Chrome Users:- Launch Google Chrome.
- On the top-right side, find the Ellipsis (three vertical dots) or kebab menu icon for more options.
- Hover over ‘More Tools’ and then click on ‘Clear Browsing Data…’
- In the window that pops up, you’ll find three tabs. Ensure you are on the ‘Basic’ tab.
- Check ‘Cached images and files’.
- You can customize the time range to clear cache data from the last hour up to all time.
- Once you’ve selected the range, click on ‘Clear Data’. </o<
- Open Mozilla Firefox.
- Click on the menu button represented by three horizontal lines in the top-right corner of the screen.
- Select ‘Preferences’ or ‘Options’.
- Click on the ‘Privacy & Security’ panel on the left side.
- In the ‘Cookies and Site Data’ section, click on ‘Clear Data…’.
- In the clear data dialog, uncheck ‘Cookies and Site Data’ if you only want to clear the cache, and leave ‘Cached Web Content’ checked.
- Click ‘Clear’.
- Click the three-dot menu button in the upper-right corner.
- Select “More tools” and click on “Clear browsing data.”
- Choose the time range. To clear everything, select “All time.”
- Check the box next to “Cached images and files.” Uncheck the others if cache is the only target.
- Click “Clear data” to finalize the cache clearance.
- Open Chrome and tap the three-dot menu.
- Go to “Settings” and select “Privacy.”
- Tap “Clear browsing data.”
- Select the desired time range and check “Cached images and files.”
- Confirm by tapping “Clear data.”
- Click the three-dot menu on the top right.
- Select “Settings” and then “Privacy, search, and services.”
- Under “Clear browsing data,” click “Choose what to clear.”
- Specify a time range and check “Cached images and files.”
- Click “Clear now.”
- Click the gear icon and select “Internet Options.”
- On the General tab, under “Browsing history,” click “Delete.”
- Check “Temporary Internet files and website files.”
- Click “Delete” and wait for the process to complete.
- Go to “Settings” and scroll down to “Safari.”
- Scroll to “Clear History and Website Data” and tap it.
- Confirm the action.
- Click the menu button and choose “Options.”
- Go to “Privacy & Security” and scroll to “Cookies and Site Data.”
- Click “Clear Data,” check “Cached Web Content,” and proceed by clicking “Clear.”
Your Chrome browser cache is now empty.
For Firefox Users:You’ve successfully cleared the cache in Firefox.
Keeping the cache cleared in your preferred browser ensures that you’re not just customizing for a personalized experience, but also optimizing for the best possible performance.

Executing Cache Deletion
Clearing the browser cache is more than a trivial task; it’s a vital maintenance step that ensures the speed and reliability of web browsing. Systematic flushing of the cache prevents the accumulation of outdated data, avoiding potential conflicts and security concerns that can arise from stale content.
To effectively clear the browser cache across different platforms, follow these clear-cut guidelines:
On Google Chrome for Windows and Linux:
On Google Chrome for Android:
On Microsoft Edge:
On Internet Explorer:
On Safari for iOS:
On Mozilla Firefox for Windows and Linux:
Implementation of these steps on a routine basis will certainly bolster browser responsiveness, delivering an uncluttered, optimized online experience. Implementing these practices will not only refine the browser’s performance but will also safeguard privacy and security by eliminating potentially problematic cached data.

Maintaining browser performance is essential for a seamless internet experience, and clearing your cache is a significant part of that maintenance. By following the steps outlined earlier, you can effortlessly manage your browser’s cache on your Mac and ensure that it operates efficiently. Remember, clearing your browser cache not only improves load times but also resolves potential issues related to old data. Regularly clearing your cache is a good practice to keep in mind for any internet user aiming for both optimal browser functionality and enhanced privacy.