Rufus Windows 11 FAQs: Step-by-Step USB Creation

Rufus Windows 11 FAQs: Your guide to using Rufus for Windows 11, including tips, troubleshooting, and partition schemas.
Introduction – Rufus Windows 11 FAQs
Creating a bootable USB drive for Windows 11 is crucial for many users, whether for installation or troubleshooting purposes. Rufus is a popular tool that simplifies this process, offering speed, efficiency, and reliability. This blog post aims to answer common questions about using Rufus for Windows 11, providing an in-depth guide to help you navigate the tool effectively.
In this article, we’ll cover everything from the basics of Rufus to detailed instructions on creating a bootable USB for Windows 11. We’ll also discuss common issues and troubleshooting tips, ensuring you have all the information you need in one place. For those interested in exploring more about Rufus and Windows 11, check out our comprehensive guide and step-by-step tutorial.
What is Rufus?
Overview of Rufus
Rufus, short for Reliable USB Formatting Utility with Source, is a free and open-source tool designed to format and create bootable USB drives. Developed by Pete Batard, Rufus has gained a reputation for its simplicity and efficiency. The tool is particularly popular for creating bootable drives for installing operating systems like Windows, Linux, and others.
History and Development
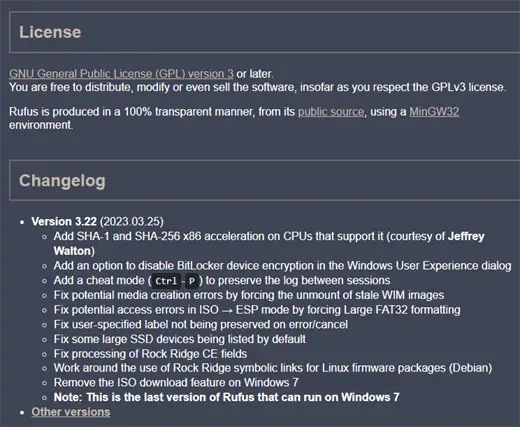
Rufus was initially released in 2011. Over the years, it has undergone several updates to improve functionality and user experience. The tool is regularly updated to support the latest operating systems and file formats.
Key Features and Functionalities
- User-friendly Interface: Rufus offers a straightforward interface, making it easy for users of all skill levels.
- Speed: Rufus is known for its fast performance, often completing tasks quicker than other similar tools.
- Compatibility: Rufus supports a wide range of file systems, including FAT32, NTFS, UDF, and exFAT.
- Versatility: It can create bootable USBs for a variety of operating systems, not just Windows.
For more detailed features, visit the official Rufus website.
How Does Rufus Work?
Rufus simplifies the process of creating a bootable USB drive by automating many of the steps involved. Here’s a brief overview of how it works:
Interface and Usability
Rufus features a clean, intuitive interface that guides you through the process of creating a bootable USB drive. The main window includes fields for selecting the USB drive, partition schema file system, and the bootable ISO file.
Step-by-Step Guide to Using Rufus
- Download and Install: Download Rufus from the official website and run the executable file. No installation is required.
- Select USB Drive: Insert your USB drive and select it from the “Device” dropdown menu.
- Choose Partition Schema and File System: Select the appropriate partition schema (GPT or MBR) and file system (NTFS or FAT32) based on your needs.
- Select ISO File: Click on the “Select” button and choose the Windows 11 ISO file from your computer.
- Start the Process: Click “Start” and follow the on-screen instructions to complete the process.
For a more detailed guide, check out our step-by-step tutorial.
Why Use Rufus for Windows 11?
Benefits of Using Rufus
Rufus offers several advantages that make it an excellent choice for creating a bootable USB for Windows 11.
Speed and Efficiency
One of the standout features of Rufus is its speed. The tool is designed to perform tasks quickly, often completing the creation of a bootable USB faster than other similar tools. This efficiency is particularly useful when dealing with large ISO files like Windows 11.
Compatibility with Windows 11
Rufus is fully compatible with Windows 11, making it a reliable choice for creating a bootable USB drive for this operating system. The tool is regularly updated to ensure compatibility with the latest versions of Windows.
Alternatives to Rufus
While Rufus is an excellent tool, there are alternatives available. Here are a few:
Media Creation Tool
The Media Creation Tool is an official tool from Microsoft designed to create a bootable USB for Windows installations. While it is user-friendly, it is not as fast as Rufus.
UNetbootin
UNetbootin is another alternative that supports a wide range of operating systems. However, it is more commonly used for Linux distributions and may not be as efficient for Windows installations.
For more alternatives, you can visit our detailed comparison.
How to Create a Bootable USB for Windows 11 using Rufus?
Creating a bootable USB for Windows 11 using Rufus is a straightforward process. This section will guide you through each step, ensuring you have all the information you need to complete the task successfully.
System Requirements
Before you begin, it’s essential to ensure that your system meets the minimum requirements for running Rufus and creating a bootable USB for Windows 11.
Minimum Hardware and Software Requirements
- USB Drive: At least 8GB of storage capacity.
- Operating System: Windows 7 or later.
- Processor: 1 GHz or faster with at least two cores.
- RAM: 4 GB minimum.
- Disk Space: 64 GB or larger storage device.
- Windows 11 ISO File: Download the official ISO from the Microsoft website.
Downloading Rufus
To get started with Rufus, you’ll need to download the tool from a reliable source.
Where to Download Safely
You can download Rufus from its official website. Make sure to download the latest version to ensure compatibility with Windows 11.
Installation Steps
- Download the executable: Visit the official Rufus website and click on the download link.
- Run the executable: Once downloaded, double-click the executable file to run Rufus. Note that Rufus does not require installation; it runs directly from the executable.
Preparing the USB Drive
Before creating a bootable USB, you need to prepare your USB drive.
Selecting the USB Drive
Insert your USB drive into a USB port on your computer. In Rufus, select your USB drive from the “Device” dropdown menu. Ensure that you have chosen the correct drive, as this process will erase all data on the selected USB drive.
Formatting the USB Drive
Formatting the USB drive ensures that it is clean and ready for the bootable files. Rufus will automatically format the drive during the bootable creation process, but you can also manually format it beforehand:
- Open File Explorer.
- Right-click on the USB drive.
- Select Format and choose the file system (NTFS or FAT32).
Configuring Rufus for Windows 11
Once your USB drive is ready, you need to configure Rufus to create the bootable USB for Windows 11.
Selecting the Windows 11 ISO File
Click on the “Select” button in Rufus and navigate to the location of your Windows 11 ISO file. Select the ISO file to load it into Rufus.
Choosing the Partition Schema (GPT vs. MBR)
The partition schema is crucial for ensuring compatibility with your system’s firmware. Here’s a quick comparison:
- GPT (GUID Partition Table): Recommended for newer systems with UEFI firmware. It supports larger drives and offers more robust data integrity features.
- MBR (Master Boot Record): Suitable for older systems with BIOS firmware. It supports drives up to 2TB.
For most modern systems, GPT is the preferred choice. In Rufus, select the appropriate partition schema from the “Partition schema” dropdown menu.
File System Options (NTFS vs. FAT32)
The file system determines how data is organized on the USB drive. Here’s a comparison:
- NTFS: Supports larger files and is more reliable but may not be compatible with all systems.
- FAT32: Compatible with more systems but has a file size limit of 4GB.
For Windows 11, NTFS is generally recommended. Select the desired file system from the “File system” dropdown menu in Rufus.
Creating the Bootable USB
With everything configured, you can now create the bootable USB for Windows 11.
Starting the Process
Click the “Start” button in Rufus to begin the creation process. A warning will appear, notifying you that all data on the USB drive will be erased. Confirm to proceed.
Monitoring Progress
Rufus will display a progress bar, showing the status of the bootable USB creation. This process may take several minutes, depending on the speed of your USB drive and computer.
Completion and Verification
Once the process is complete, Rufus will display a “Ready” message. You can now safely eject the USB drive. To ensure the bootable USB works correctly, you can test it by booting from the USB drive on your system.
For a visual guide, check out our step-by-step tutorial.
Common Issues and Troubleshooting

Even with a user-friendly tool like Rufus, you might encounter some issues while creating a bootable USB for Windows 11. This section addresses common problems and provides troubleshooting steps to resolve them.
USB Drive Not Detected
One of the most common issues users face is Rufus not detecting the USB drive.
Possible Causes
- Faulty USB Drive: The USB drive may be damaged or corrupted.
- Driver Issues: Outdated or missing USB drivers on your computer.
- Compatibility Issues: The USB drive may not be compatible with Rufus or your system.
Solutions
- Try a Different USB Port: Plug the USB drive into a different USB port on your computer.
- Update USB Drivers: Ensure that your USB drivers are up-to-date. You can update drivers via the Device Manager in Windows.
- Use a Different USB Drive: If possible, try using a different USB drive to see if the issue persists.
For more troubleshooting tips, visit our detailed guide on USB detection issues.
Error Messages
Error messages can be frustrating, but understanding what they mean can help you resolve the issue quickly.
Common Error Messages
- “ISO image extraction failure”: This error occurs when Rufus is unable to extract the ISO file.
- “Access Denied”: This error usually indicates insufficient permissions.
How to Resolve Them
- ISO Image Extraction Failure:
- Verify the integrity of the ISO file. Ensure it is not corrupted.
- Redownload the ISO file from the official Microsoft website.
- Access Denied:
- Run Rufus as an administrator. Right-click the Rufus executable and select “Run as administrator.”
- Ensure that the USB drive is not write-protected.
Rufus Not Responding
Sometimes Rufus may become unresponsive during the bootable USB creation process.
Causes of Non-Responsiveness
- High System Load: Running too many applications simultaneously can cause Rufus to become unresponsive.
- Corrupt ISO File: A corrupted ISO file can cause Rufus to hang.
Steps to Fix
- Close Unnecessary Applications: Close other running applications to free up system resources.
- Verify the ISO File: Ensure that the ISO file is not corrupted. You can use checksum tools to verify the integrity of the ISO file.
- Restart Rufus: Close Rufus and reopen it. If the issue persists, restart your computer.
Windows 11 Installation Fails
If the Windows 11 installation fails after creating a bootable USB, several factors could be at play.
Common Installation Issues
- Missing Drivers: The installation may fail due to missing drivers.
- TPM and Secure Boot Requirements: Windows 11 has specific requirements for TPM and Secure Boot.
Troubleshooting Tips
- Missing Drivers:
- Ensure you have the latest drivers installed for your hardware.
- You can download drivers from the manufacturer’s website.
- Bypassing TPM and Secure Boot Requirements:
- Rufus offers options to bypass TPM and Secure Boot requirements. When configuring Rufus, select the option to disable these checks.
- For more detailed steps, refer to our guide on bypassing TPM and Secure Boot.
Frequently Asked Questions (FAQs)
In this section, we address some of the most frequently asked questions about using Rufus for Windows 11. These FAQs aim to clear up any confusion and provide additional insights into the process.
Can Rufus Bypass TPM and Secure Boot Requirements for Windows 11?
Windows 11 has specific hardware requirements, including TPM 2.0 and Secure Boot. These requirements can be a hurdle for users with older hardware. Rufus provides a solution to this problem.
Explanation of TPM and Secure Boot
- TPM (Trusted Platform Module): A hardware-based security feature that provides cryptographic operations.
- Secure Boot: A security standard that ensures a device boots using only software trusted by the Original Equipment Manufacturer (OEM).
Steps to Bypass Using Rufus
- Open Rufus: Run Rufus and select your USB drive.
- Select Windows 11 ISO: Click the “Select” button and choose your Windows 11 ISO file.
- Configure Settings: In the “Image option” dropdown, select “Extended Windows 11 Installation (no TPM / no Secure Boot)”.
- Create Bootable USB: Click “Start” to create the bootable USB. This will bypass the TPM and Secure Boot checks during installation.
For a detailed guide, check out our step-by-step tutorial.
GPT vs. MBR: Which Partition Scheme to Use?
Choosing the correct partition schema is crucial for successfully creating a bootable USB for Windows 11.
Differences Between GPT and MBR
- GPT (GUID Partition Table): Supports larger drives and more partitions. It’s more reliable and is recommended for UEFI systems.
- MBR (Master Boot Record): Older partition scheme that supports up to 2TB drives and four primary partitions. Suitable for BIOS systems.
Recommendations for Windows 11
- Use GPT: If your system supports UEFI, GPT is the preferred choice.
- Use MBR: For older systems with BIOS firmware, MBR is more appropriate.
For more details on partition schemes, visit our comprehensive guide.
NTFS or FAT32: Which File System to Choose?
The file system you choose can impact the compatibility and functionality of your bootable USB.
Comparison of NTFS and FAT32
- NTFS: Supports larger files and is more reliable. However, it may not be compatible with all systems.
- FAT32: Compatible with more systems but has a file size limit of 4GB.
Best Practices for Windows 11
- Use NTFS: Generally recommended for Windows 11 due to its reliability and support for larger files.
- Use FAT32: If you need broader compatibility with different systems.
For additional insights, refer to our file system guide.
How to Update Rufus?
Keeping Rufus updated ensures you have the latest features and compatibility improvements.
Checking for Updates
- Visit Official Website: Go to the Rufus website.
- Download Latest Version: Compare your current version with the latest version available on the website.
Updating Process
- Download the Latest Version: Download the latest Rufus executable from the official website.
- Replace the Old File: Replace your current Rufus executable with the newly downloaded file.
Is Rufus Safe to Use?
Security is a crucial concern when using any software tool, especially one that modifies system files.
Security Aspects of Rufus
- Open Source: Rufus is open-source, meaning its code is publicly available for scrutiny.
- No Installation Required: Rufus runs directly from the executable, reducing the risk of system modifications.
- Trusted Sources: Always download Rufus from the official website to avoid malicious versions.
For more information on the safety and security of Rufus, visit our detailed review.
Additional Tips and Best Practices
Creating a bootable USB for Windows 11 using Rufus is a relatively straightforward process. However, there are some additional tips and best practices that can help ensure a smoother experience and a successful installation.
Verifying the Windows 11 ISO File
Ensuring the integrity of your Windows 11 ISO file is crucial for a successful installation. A corrupted ISO file can lead to errors and installation failures.
Importance of Verification
Verifying the ISO file ensures that the file has been downloaded correctly and is not corrupted. This step is essential to avoid issues during the bootable USB creation and Windows 11 installation process.
Tools for Verification
Several tools can help you verify the integrity of your ISO file:
- HashTab: A Windows extension that allows you to calculate and compare file hashes.
- FCIV (File Checksum Integrity Verifier): A command-line tool from Microsoft.
Steps to Verify the ISO File Using FCIV:
- Download and Install FCIV: Download FCIV from the Microsoft website.
- Calculate the Hash: Open Command Prompt and navigate to the directory containing the ISO file. Run the command:
fciv -sha256 filename.iso. - Compare the Hash: Compare the calculated hash with the official hash provided by Microsoft.
For more detailed instructions, check out our verification guide.
Backup Your Data
Before proceeding with the installation of Windows 11, it’s crucial to back up your data. This step ensures that you don’t lose any important files during the installation process.
Why Backups Are Important
Backing up your data protects against data loss due to errors, corruption, or accidental deletion. It’s a crucial step, especially when modifying system files or installing a new operating system.
How to Backup Your Data Efficiently
- Use an External Drive: Copy your important files to an external hard drive or USB drive.
- Cloud Storage: Utilize cloud storage services like Google Drive, OneDrive, or Dropbox to back up your files.
- Backup Software: Use backup software like Acronis True Image or Macrium Reflect for a more comprehensive backup solution.
For more tips on backing up your data, visit our data backup guide.
Testing the Bootable USB
After creating the bootable USB, it’s a good idea to test it to ensure it works correctly. This step helps you identify any issues before proceeding with the Windows 11 installation.
Methods to Test
- Boot from the USB Drive: Insert the USB drive into your computer and restart it. Enter the BIOS/UEFI settings and set the USB drive as the primary boot device. Ensure that the system boots from the USB drive and the Windows 11 installation screen appears.
- Virtual Machine: Use a virtual machine tool like VirtualBox or VMware to test the bootable USB. Create a new virtual machine and configure it to boot from the USB drive.
Ensuring the USB Works on Different Systems
Test the bootable USB on different computers to ensure compatibility. This step is especially important if you plan to use the USB drive on multiple systems.
For more detailed testing methods, check out our testing guide.
Conclusion
Creating a bootable USB for Windows 11 using Rufus is a straightforward process that offers several benefits, including speed, efficiency, and compatibility. By following the steps outlined in this guide, you can easily create a bootable USB and successfully install Windows 11 on your system.
To summarize:
- Rufus is a reliable tool for creating bootable USB drives.
- System Requirements: Ensure your system meets the minimum requirements.
- Download and Prepare: Download Rufus, select and format your USB drive, and configure Rufus for Windows 11.
- Troubleshooting: Address common issues and follow the troubleshooting tips provided.
- FAQs: Refer to the FAQs for additional insights and solutions.
For more detailed guides and tutorials, check out our related articles on downloading Rufus for Windows 11, using Rufus for Windows 11, and creating a bootable USB for Windows 11 with Rufus.
References and Further Reading
To deepen your understanding and explore more about Rufus and Windows 11, here are some valuable resources:
Feel free to revisit this guide whenever you need assistance with using Rufus for Windows 11. If you have any questions or need further clarification, don’t hesitate to reach out or leave a comment below. Happy bootable USB creation!
More Rufus Windows 11 FAQs
What is GPT (in the context of Disc Drive Schema)?
The GUID Partition Table (GPT) was introduced as part of the Unified Extensible Firmware Interface (UEFI) initiative. GPT provides a more flexible mechanism for partitioning disks than the older Master Boot Record (MBR) partitioning scheme that was common to PCs. [ source: What a GPT disk is – Microsoft]
-
Can I use Rufus for Windows 11?
Yes, Rufus is a great tool to create bootable USB drives for installing Windows 11.
-
How to use Rufus for Windows 11 bootable USB?
1. Download the Rufus tool from the official website at https://rufus.ie/en/.
2. Insert a USB drive into your computer that has at least 8GB of space available.
3. Open the Rufus tool and select the USB drive you want to use from the device list.
4. Under the “Boot selection” section, click the “Select” button and browse to the location where you have the Windows 11 ISO file saved on your computer.
5. Once you have selected the Windows 11 ISO file, select the partition schema you want to use. For Windows 11, you can select either MBR or GPT partition schema depending on your system’s requirements. (For Boot Disk select GPT Partition Schema for Windows 11)
6. Choose the file system you want to use. For Windows 11, it is recommended to use NTFS.
7. Ensure the “Create a bootable disk using” option is selected and click on the “Start” button to begin the process.
8. Once the process is complete, the USB drive will be ready for use as a bootable Windows 11 installation media. -
How to create Windows 11 bootable USB on Windows 11?
1. Download the Rufus tool from the official website at https://rufus.ie/en/.
2. Insert a USB drive into your computer that has at least 8GB of space available.
3. Open the Rufus tool and select the USB drive you want to use from the device list.
4. Under the “Boot selection” section, click the “Select” button and browse to the location where you have the Windows 11 ISO file saved on your computer.
5. Once you have selected the Windows 11 ISO file, select the partition schema you want to use. For Windows 11, you can select either MBR or GPT partition schema depending on your system’s requirements. (For Boot Disk select GPT Partition Schema for Windows 11)
6. Choose the file system you want to use. For Windows 11, it is recommended to use NTFS.
7. Ensure the “Create a bootable disk using” option is selected and click on the “Start” button to begin the process.
8. Once the process is complete, the USB drive will be ready for use as a bootable Windows 11 installation media. -
How to use Rufus to install Windows 11 without TPM?
1. Download the Rufus tool from the official website at https://rufus.ie/en/.
2. Insert a USB drive into your computer that has at least 8GB of space available.
3. Open the Rufus tool and select the USB drive you want to use from the device list.
4. Under the “Boot selection” section, click the “Select” button and browse to the location where you have the Windows 11 ISO file saved on your computer.
5. Once you have selected the Windows 11 ISO file, select the partition scheme you want to use. For Windows 11, you can select either MBR or GPT partition scheme depending on your system’s requirements.
6. Choose the file system you want to use. For Windows 11, it is recommended to use NTFS.
(Latest versions of Rufus will show you the options to bypass TPM/Secure Boot with Windows 11 after you’ve clicked “START” to create the Boot USB provided the Windows operating system is at least Windows 8 or later versions of Windows)
7. Ensure the “Create a bootable disk using” option is selected and click on the “Start” button to begin the process.
8. Once the process is complete, the USB drive will be ready for use as a bootable Windows 11 installation media without TPM. -
How to convert Windows 11 ISO to bootable USB?
1. Download the Rufus tool from the official website at https://rufus.ie/en/.
2. Insert a USB drive into your computer that has at least 8GB of space available.
3. Open the Rufus tool and select the USB drive you want to use from the device list.
4. Under the “Boot selection” section, click the “Select” button and browse to the location where you have the Windows 11 ISO file saved on your computer.
5. Once you have selected the Windows 11 ISO file, select the partition schema you want to use. For Windows 11 bootable USB, select GPT partition schema.
6. Choose the file system you want to use. For Windows 11, it is recommended to use NTFS.
7. Ensure the “Create a bootable disk using” option is selected and click on the “Start” button to begin the process.
8. Once the process is complete, the USB drive will be ready for use as a bootable Windows 11 installation media. -
Why is my bootable USB not working Windows 11?
There can be several reasons why a bootable USB is not working in Windows 11. Some of the common reasons are:
1. The USB drive is not properly formatted: The USB drive must be formatted using a file system that is recognized by Windows 11, such as NTFS. If the USB drive is not formatted correctly, it may not be recognized by the computer during the boot process.
2. The USB drive is not set as the primary boot device: The computer may be set to boot from a different device such as the hard drive or CD/DVD drive. In this case, the USB drive may not be recognized during the boot process. You need to check the boot order in the BIOS settings and set the USB drive as the primary boot device.
3. The Windows 11 ISO file is corrupt: If the Windows 11 ISO file is corrupt, the USB drive may not be able to boot properly. You can try downloading the ISO file again and create a new bootable USB drive using Rufus.
4. The Rufus tool was not used correctly: If Rufus was not used correctly to create the bootable USB drive, it may not be recognized during the boot process. You can try creating the bootable USB drive again using the correct settings in Rufus.
5. The computer hardware is incompatible: In some cases, the hardware on the computer may not be compatible with Windows 11. You can check the system requirements for Windows 11 and make sure that your computer meets the minimum requirements. -
What format should a bootable USB be for Windows 11?
For creating a bootable USB for Windows 11, it is recommended to use the NTFS file system format. NTFS provides better support for large files and is more robust compared to other file systems such as FAT32. It is also the default file system used by Windows 11.
However, it is important to note that not all systems may support booting from NTFS formatted drives. In such cases, you may need to use a different file system format such as FAT32 or exFAT, depending on your system’s requirements. You can check your system’s documentation or specifications to find out which file system format is recommended for bootable USB drives.
Additionally, when using Rufus to create a bootable USB drive for Windows 11, you should choose the appropriate partition schema which is GPT for a boot drive. Rufus supports multiple partition schemes such as MBR and GPT and file system formats such as FAT32, NTFS, and exFAT.
-
Should I use NTFS or FAT32 for USB Windows 11?
For creating a bootable USB for Windows 11, it is recommended to use the NTFS file system format. NTFS provides better support for large files and is more robust compared to other file systems such as FAT32. It is also the default file system used by Windows 11.
Additionally, when using Rufus to create a bootable USB drive for Windows 11, you can choose the appropriate partition schema and file system format depending on your system’s requirements. Rufus supports multiple partition schemes such as MBR and GPT and file system formats such as FAT32, NTFS, and exFAT.
-
Does Windows 11 recognize FAT32?
Yes, Windows 11 does recognize the FAT32 file system. However, it is important to note that there are some limitations with using FAT32 on Windows 11.
FAT32 has a maximum file size limit of 4GB, which means that it may not be suitable for larger files such as ISO images or large media files. Additionally, FAT32 may not support some advanced features such as file permissions or journaling, which are available in other file systems such as NTFS.
Despite these limitations, FAT32 is still a widely used file system and can be useful in certain situations, such as when creating bootable USB drives or when using external storage devices that need to be compatible with multiple operating systems.
-
How do I format a 64gb USB to FAT32 in Windows 11?
Windows 11 does not have a built-in tool to format a 64GB USB drive to the FAT32 file system. However, there are third-party tools available that can help you format larger USB drives to FAT32. One such tool is Rufus, which is a free and open-source application that can create bootable USB drives and also format them to different file systems.
Here are the steps to format a 64GB USB drive to FAT32 using Rufus:
1. Download and install Rufus from the official website.
2. Insert the 64GB USB drive into your computer.
3. Open Rufus and select the 64GB USB drive from the Device dropdown list.
4. Choose FAT32 as the File system format.
5. Choose MBR or GPT partition scheme depending on your system’s requirements.
6. Choose the Cluster size depending on the size of the files you will be storing on the USB drive.
7. Give the USB drive a new name if required.
8. Click on the Start button to begin the format process.Note that formatting a USB drive will erase all data on it, so make sure to backup any important data before proceeding with the format.
-
Why can’t I format USB to FAT32 Windows 11?
One reason why you may not be able to format a USB drive to FAT32 in Windows 11 is that the file system is not supported for the size of the USB drive you are using.
FAT32 has a maximum file size limit of 4GB and a maximum volume size limit of 32GB. This means that if you are trying to format a USB drive larger than 32GB to FAT32, you may encounter issues. In this case, you may need to use a different file system such as exFAT or NTFS, which supports larger file sizes and volume sizes.
Another reason why you may not be able to format a USB drive to FAT32 in Windows 11 is that the option to choose FAT32 is not available in the format dialog box. This is because Windows 11 only offers the FAT32 file system for drives smaller than 32GB in size. For larger drives, you will need to use a third-party tool such as Rufus to format them to FAT32.
In summary, the inability to format a USB drive to FAT32 in Windows 11 may be due to limitations of the FAT32 file system or the limitations of the built-in format tool in Windows 11.
-
What is the limit of FAT32 in Windows 11?
The maximum volume size limit for the FAT32 file system in Windows 11 is 32GB. This means that if you are formatting a USB drive or other storage device using the FAT32 file system in Windows 11, the maximum size that the volume can be is 32GB.
Additionally, the maximum file size that can be stored on a FAT32 volume is 4GB. This means that if you need to store individual files larger than 4GB, you may need to use a different file system such as NTFS or exFAT.
It’s important to note that the 32GB limit for the FAT32 file system is a limitation of the file system itself, and not specific to Windows 11. This limit is also applicable to other operating systems that support the FAT32 file system.
Despite these limitations, FAT32 is still a widely used file system and can be useful in certain situations, such as when creating bootable USB drives or when using external storage devices that need to be compatible with multiple operating systems.
-
Is 64GB too big for FAT32?
The maximum volume size limit for the FAT32 file system is 32GB, which means that formatting a storage device that is larger than 32GB to FAT32 is not recommended.
However, there are some workarounds to format larger storage devices to FAT32. For example, you can use a third-party tool such as Rufus to format a storage device larger than 32GB to FAT32. Rufus has an option to format drives larger than 32GB to FAT32 by using a process known as “exFAT for bootable drives.” This allows the drive to be formatted as FAT32 and still be bootable.
It’s important to note that even if you are able to format a 64GB storage device to FAT32, the maximum file size limit for the FAT32 file system is 4GB. This means that if you need to store individual files larger than 4GB, you may need to use a different file system such as NTFS or exFAT.
-
Is exFAT better than NTFS?
Whether exFAT or NTFS is better depends on your specific use case and requirements.
exFAT (Extended File Allocation Table) is a file system that was developed by Microsoft to be used on flash drives and other external storage devices. It has several advantages over NTFS, including:
Compatibility: exFAT is supported by Windows, Mac OS, and Linux operating systems, making it an ideal choice for external storage devices that need to be used across different platforms.
Large file size support: exFAT supports file sizes up to 16 exabytes, which is significantly larger than the 4GB limit of FAT32 and the 2TB limit of MBR partitions.
No fragmentation: Unlike NTFS, exFAT does not suffer from fragmentation issues, which can slow down file access times and degrade performance over time.On the other hand, NTFS (New Technology File System) is a file system that was introduced with Windows NT and is widely used on internal hard drives and other types of storage devices.
Some of the advantages of NTFS over exFAT include:
Security: NTFS supports file-level security permissions and encryption, making it a better choice for storing sensitive data.
Better performance: NTFS is designed for use on internal hard drives and is optimized for performance, especially with large files and in scenarios where there are a large number of files on the drive.
Reliability: NTFS includes a number of features such as journaling and fault tolerance that help to ensure the integrity of the file system.
In summary, exFAT is a good choice for external storage devices that need to be used across different platforms and that require support for large file sizes. NTFS is a better choice for internal hard drives and other storage devices that require better performance, security, and reliability.
-
How do I format a 256gb USB to FAT32?
The FAT32 file system has a maximum volume size limit of 32GB, which means that you cannot format a 256GB USB drive to FAT32 using the standard Windows formatting tool. However, there are third-party tools available that can help you format larger drives to FAT32.
One such tool is Rufus, which is a popular free and open-source utility for creating bootable USB drives.Here’s how you can use Rufus to format a 256GB USB drive to FAT32:
1. Download and install Rufus from the official website (https://rufus.ie/en/).
2. Connect the 256GB USB drive to your computer.
3. Open Rufus and select the USB drive you want to format from the Device dropdown menu.
4. Under the File system dropdown menu, select FAT32.
5. Under the Cluster size dropdown menu, leave the default setting (4096 bytes) selected.
6. Click the Start button to begin the formatting process.Note that formatting a large drive to FAT32 can take a while, so be patient and don’t interrupt the process. Once the process is complete, you will have a 256GB USB drive that is formatted to FAT32 and ready to use.
Related Articles:
More information:
- UEFI/GPT-based hard drive partitions
- Windows Setup: Installing using the MBR or GPT partition style
- To download Rufus, Click this link: https://rufus.ie/en/
- Rufus FAQs